
Over time, decks can suffer from wear and tear, water damage, and sun exposure. Often, the result is wood rot or structural problems that can be costly to repair. However, you need not worry, for the experts at Deck Repair Summerville SC is willing to help you.
Loose railings can become tripping hazards and must be repaired immediately. Stairs and steps can also loosen, requiring reinforcement or replacement.
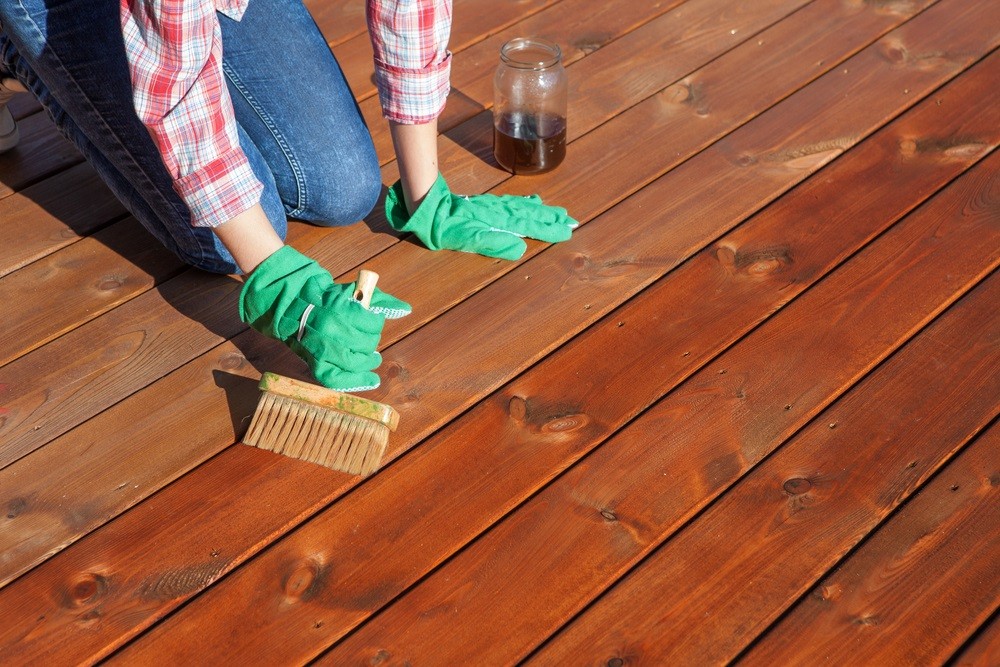
Staining your deck gives it a fresh look and helps protect the wood from moisture. Choose a color that matches your home and/or landscape. Solid hide stains, like Behr’s SharkSkin, mask discoloration and grain and texture variations. If you use this type of stain, consider applying two coats to ensure coverage.
Be sure to test your stain before you begin, and be prepared for a messy project. Have a drop cloth or tarp nearby to catch drips, and use painter’s tape to block off areas you don’t want stained (like plants, railings, or the stairs). Choose a sunny day with cool temperatures and windless conditions. Applying stains in harsh, direct sunlight and inclement weather can cause lap marks.
If you’re using a roller, get one with a nap that is appropriate for your deck surface: 1/8 to 3/16 inches for smooth surfaces and a nap of 3/8 to 1/2 inch for rougher or textured woods. A foam or polystyrene fiber roller works well. Mix your stain to ensure consistency, and work on small sections at a time. Aim for thin coats of stain; thick coats won’t soak in and could flake when dry.
Sealing
A clear sealant keeps the wood’s color and beauty while protecting against mold, mildew, and fungus growth. It also prevents wood rot and helps the deck last longer by keeping out damaging moisture. Decks should be resealed every one to three years.
To ensure proper adhesion, the deck should be cleaned thoroughly using a power washer with a pressure nozzle to remove dirt, mildew, and debris. The deck should be allowed to dry for several days before staining or sealing. Depending on the type of stain or sealer you choose, it may be applied with brushes, rollers, stain pads, or sprayers according to manufacturer instructions. The sealer should be brushed on in small sections, focusing on open pores and the grain of the wood. This will help to prevent splotchy appearances and will allow the sealant to penetrate deeply into the wood rather than simply coating the surface.
When selecting a deck sealer, consider the wood’s age and condition. Older decks can experience more damage than newer ones and need a more robust protective layer to restore and extend the life of the wood. Look for a sealant that has restorative properties to address the specific issues that older decks are prone to, such as drying out and cracking or fading and graying due to UV exposure.
Also, if your deck has splinters, you’ll want to fill them with latex wood filler. This will not only keep the splinters from getting worse, but it’ll also make the deck more stable. If you notice protruding nails, remove them and install replacements with a deck nailer. If you’re going to replace the nails, be sure to use a stainless steel deck nailer that will resist corrosion from the sun and salt water.
Repairing damaged boards
Decks can become damaged from everyday wear and tear as well as water, rock salt used to melt snow and ice in the winter, and sun exposure. These problems can cause a variety of issues, from warped boards to rotting joists to deteriorated steps and railings. Many times, these issues can be addressed without the need for a full replacement of the board or deck.
In some cases, wood damage can be repaired by simply sanding the affected area and applying epoxy. In more severe situations, the board may need to be replaced. Ultimately, it is best to contact a professional for board repair or replacement because extensive repairs often require heavy equipment rentals and advanced carpentry skills.
If your deck is showing signs of rot, such as textbook sponginess when you poke the surface with a screwdriver or awl, it’s important to remove all the rotted material until you can feel solid wood beneath. Once you’ve removed the rotted material, clean the area and apply a wood filler, such as Bondo, according to Everyday Home Repair.
To help prevent future rot, consider installing flashing between your house and the deck, especially on stairs or in high-traffic areas. Vinyl flashing is a good option and can be cut to size with tin snips. The flashing should be fastened with roofing nails at least every 12 inches.
If your deck board has been damaged by a serious problem, such as rot or termite infestation, you’ll need to replace it with new lumber. Start by removing the old board with a nail puller and pry bar, being careful not to damage adjacent planks. Next, inspect the joist and beam for damage and mark where to place the new board. With a circular saw, carefully cut the new board to size. Once the new board is in place, connect it to the joist with angle brackets and structural screws.
Repairing Cracks
Cracks are an unavoidable part of deck aging and can be repaired with wood filler. Before you can fill in these cracks, however, you will need to make sure the underlying deck joists are structurally sound. If you notice that the joists are rotten, then you will need to contact a professional for more involved deck repair.
Deck boards will also crack if they have been damaged by repeated pressure from foot traffic and the sun’s UV rays. This type of damage can be prevented by using a wood sealant or stain when the board is first installed. You should re-stain or repaint the deck every two to three years to keep the wood protected.
Wood rot is another common cause of deck board cracks. This is usually evident by a textbook sponginess when you poke a piece of wood with a screwdriver or other tool. Luckily, according to Everyday Home Repair, wood rot is a relatively easy fix for most decks.
If you have cracked boards that are only cosmetically damaged, you can use waterproof resin glue to fill in the cracks. This will ensure that the cracks do not reopen as the weather changes and humidity levels fluctuate.
For the more serious cracks, you will need to replace the affected board. This can be done by first removing the old board and checking the underside to see if it is in good condition. If the underside of the board is clean, then you can flip it over and reattach it to the deck with deck screws. Otherwise, you will need to cut a new board to size and attach it to the joists with deck screws.
Replacing Stairs
If your deck stairs are sagging, wobbly, or otherwise unstable, you need to replace them. Stairs that aren’t stable are a safety hazard and can cause injuries to people using the deck.
Before you start, take your time to carefully inspect the deck for structural damage. In particular, look for rot in the ledger board (the long, pressure-treated board that attaches to the house). If the rot has spread to this area, it may be time to consider a major deck renovation.
The first step in building new stairs is to mark the height of your staircase. Use a tape measure and mark the height on each stringer. You can also use a level to check the slope of the stairs. The slope should be about 40 degrees, and the stairs should not be too high or too low.
Next, double-check your measurements. Purchase wood that closely matches your deck and stair risers, and make sure the new boards match in size and length. You can also buy pre-cut stringers at many hardware stores, which saves you some work.
Once you have the materials, it’s time to begin construction. Before nailing the new stringers in place, make sure they are square by “cross-taping” them. This process involves shifting the stairs back and forth until they are aligned. If the stairs are uneven, sand the stringers to get them even.
The last step is to install the new deck stairs. If you’re installing the same type of stairs as the existing ones, skip to the next section. Otherwise, start by removing the old deck steps with a hammer and nail puller. Be careful not to pierce the joists below, as this could cause the stairs to collapse. Then, use a jigsaw to remove the old deck boards and a scrap piece of 2×6 to guide your cuts.


 The installation of a metal roof can be a dangerous project. Because of its size, fragility, and weight, it’s best to leave this work to metal roofing professionals

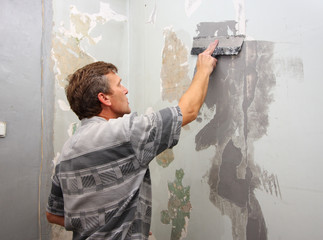
 A full restoration should be done, including removing the old stucco, installing new building paper and metal lath, patching all areas of damage, and applying three coats of stucco repair mix.
 Residential paving can be expensive, depending on the type of material used and the labor costs involved. The price of the material can vary by region, too. For example, asphalt is less expensive than concrete in some areas, and sand or gravel can be cheaper in others. The size and location of the driveway are also important factors to consider when calculating the total cost.
 The roofing industry has always had jobs for skilled roofers who may specialize in one area or many different aspects of roof maintenance and repair. Roofers
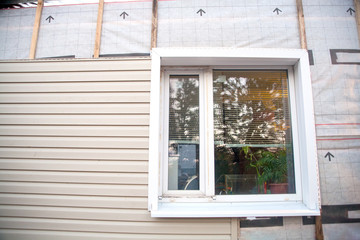
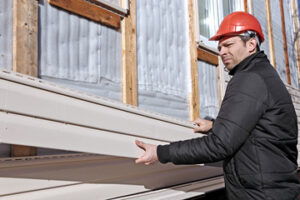 While there are many types of siding, vinyl siding is the most popular choice. It’s low maintenance and inexpensive and comes in hundreds of colors. There are several different profiles, including shakes, shingles, fish scales, and lap. It doesn’t need much maintenance, but you might need to scrub it occasionally to keep it looking good. You can hire a professional contractor at